Adding color to your pyrography projects can add a whole new layer to your piece. There are many mediums that can be used to add color, and they can create many different effects. All color options are up to you to decide – what you like best and what you are trying to convey with your piece.
Here is a list of some options you can use, along with a demonstration of a few of them.
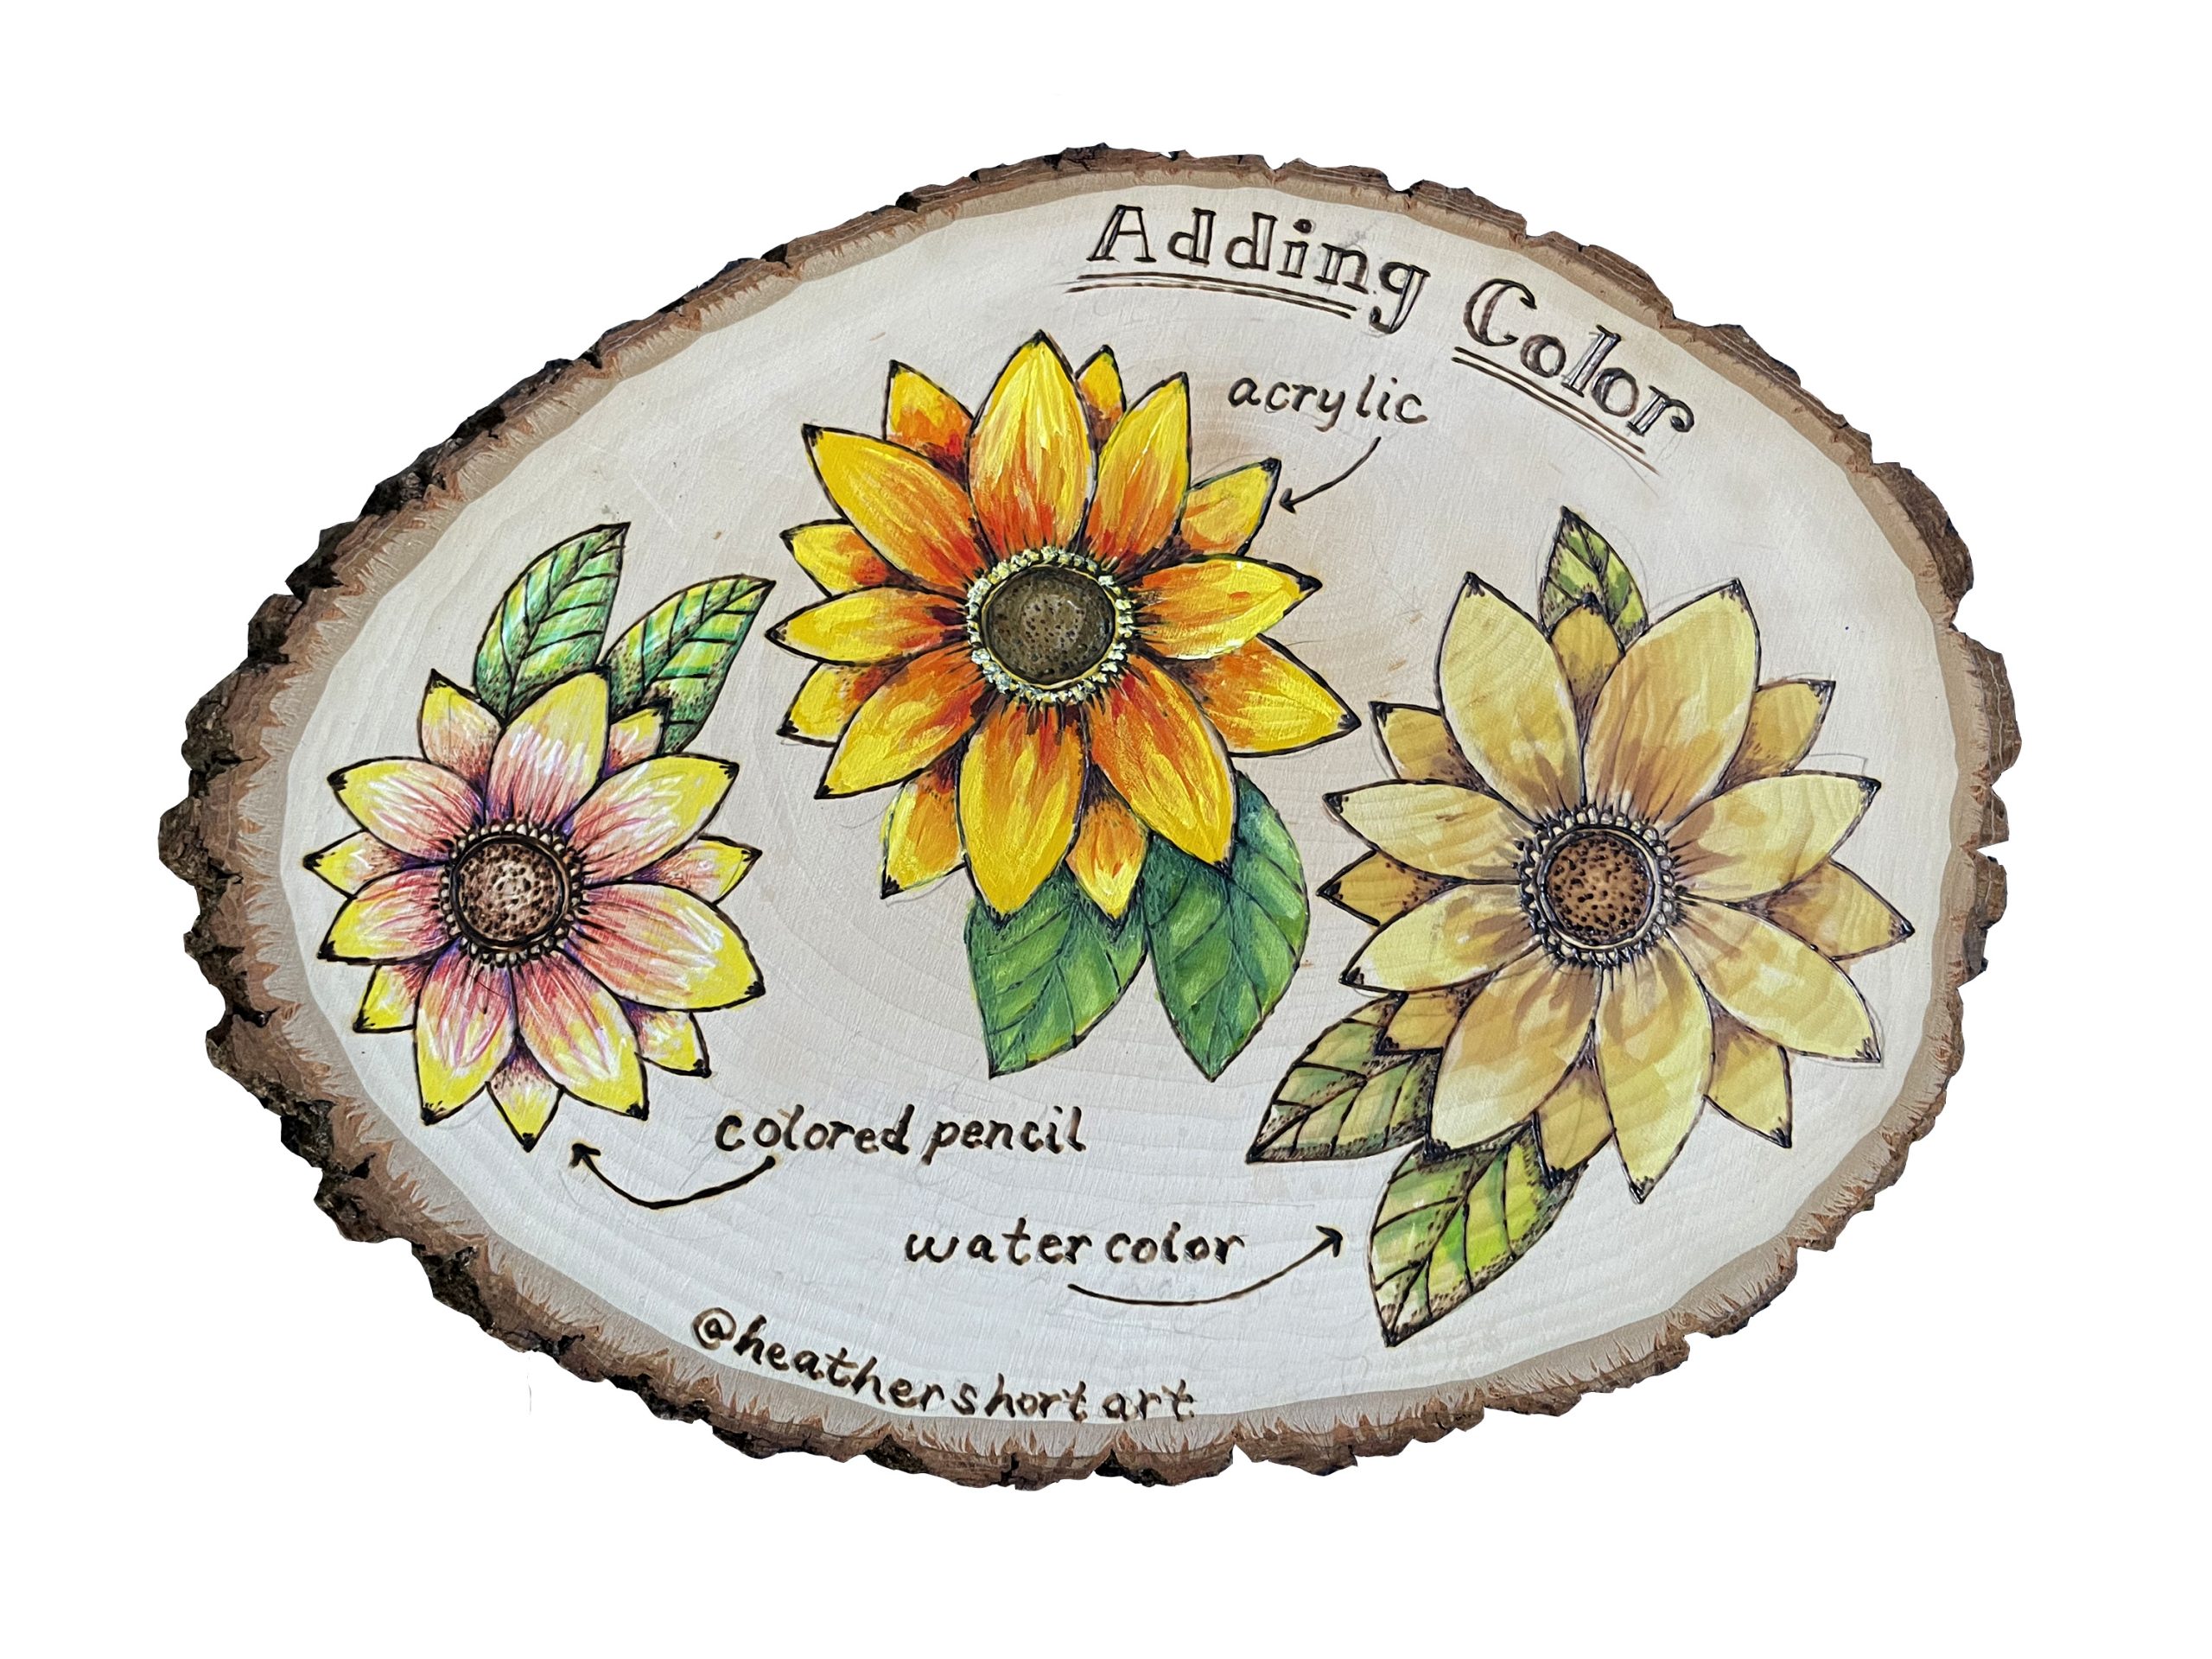
Please note that colors should be added AFTER burning your design into your piece. Burning over color can be toxic not to mention difficult at times.
Acrylic
Acrylic is my go-to option for my wood-burning designs because it is easy to use and works well on wood. It will also remain vibrant over time. You can get a great depth of color.
Watercolor/Watercolor Pencils
Watercolor dries quickly, is very versatile, and the vibrancy can be adjusted by how much you dilute it with water. Adding too much water can absorb into the wood and make the color bleed past your burn lines. Just like when using watercolor on paper, you can use masking fluid to help block areas you don’t wish the color to spread to. This coloring medium can give more subtle colors and convey a softer, more romantic feel or tone.
Colored Pencils
Colored pencils are easy to control and can give a nice vibrant color. They apply easily to wood and can be blended, layered, sometimes erased, and come in a variety of colors
Stain
Stains add color and protection to your piece. They are trickier to apply and can be toxic to inhale, so follow all safety guidelines when using these. Water-based stains are less messy and easier to clean up after. Stains can get blotchy and uneven but using a wood conditioner prior to application can help with this issue. Be careful not to use too dark a color as this will make it harder to see your wood-burned lines.
Markers
Markers are an easy way to color your piece. They come in a variety of colors and can also be layered and blended on the piece.
Here’s the video I made while working on the project you see above:
I hope this has been helpful to you but If you have any questions or suggestions, please let me know through the comments below or send us an email at hello@truart.co
Such a helpful video, thank you! I just wondered if you would need to use any kind of to coat to seal the paint on the project? Possibly a daft question but I’m totally new to this kind of crafting!
Thanks!
L x
Choosing the appropriate type of finish depends mainly on how your workpiece is displayed or used. Would it be outdoors or indoors? Is it a functioning piece of art such as a coaster or chopping board? Once you have the answer to that, check out the video clip below that I found online. It has very useful tips and a lot of good information on what you would need to do.
https://www.youtube.com/watch?v=oFwWrAq47io
What would be the best way to seal in painting on your pyrography? Clear enamel, clear, acrylic, or a beeswax or linseed oil 🤷🏻♀️
Very interesting information, I would have liked seeing results using oil pencils.